AMBER20在centos7上的安装教程
昨夜山河齐恸震,今朝双星辞九州!两位国士一路走好! 成功的背后,知识、汗水、灵感、机遇缺一不可!!!
本教程在centos 7.3亲测有效,对于其他发行版本的Linux,该思路流程同样适用!!!
先前准备工作
- 查看当前服务器的系统版本
>>> cat /etc/redhat-release (发行版本)
[output]:
CentOS Linux release 7.3.1611 (Core)
or
>>> uname -a (查看详细信息)
[output]:
Linux gpu01 3.10.0-514.el7.x86_64 #1 SMP Tue Nov 22 16:42:41 UTC 2016 x86_64 x86_64 x86_64 GNU/Linux
>>> uname -r (查看内核)
[output]:
3.10.0-514.el7.x86_64
- CUDA的安装
CUDA的下载链接:https://developer.nvidia.com/cuda-downloads
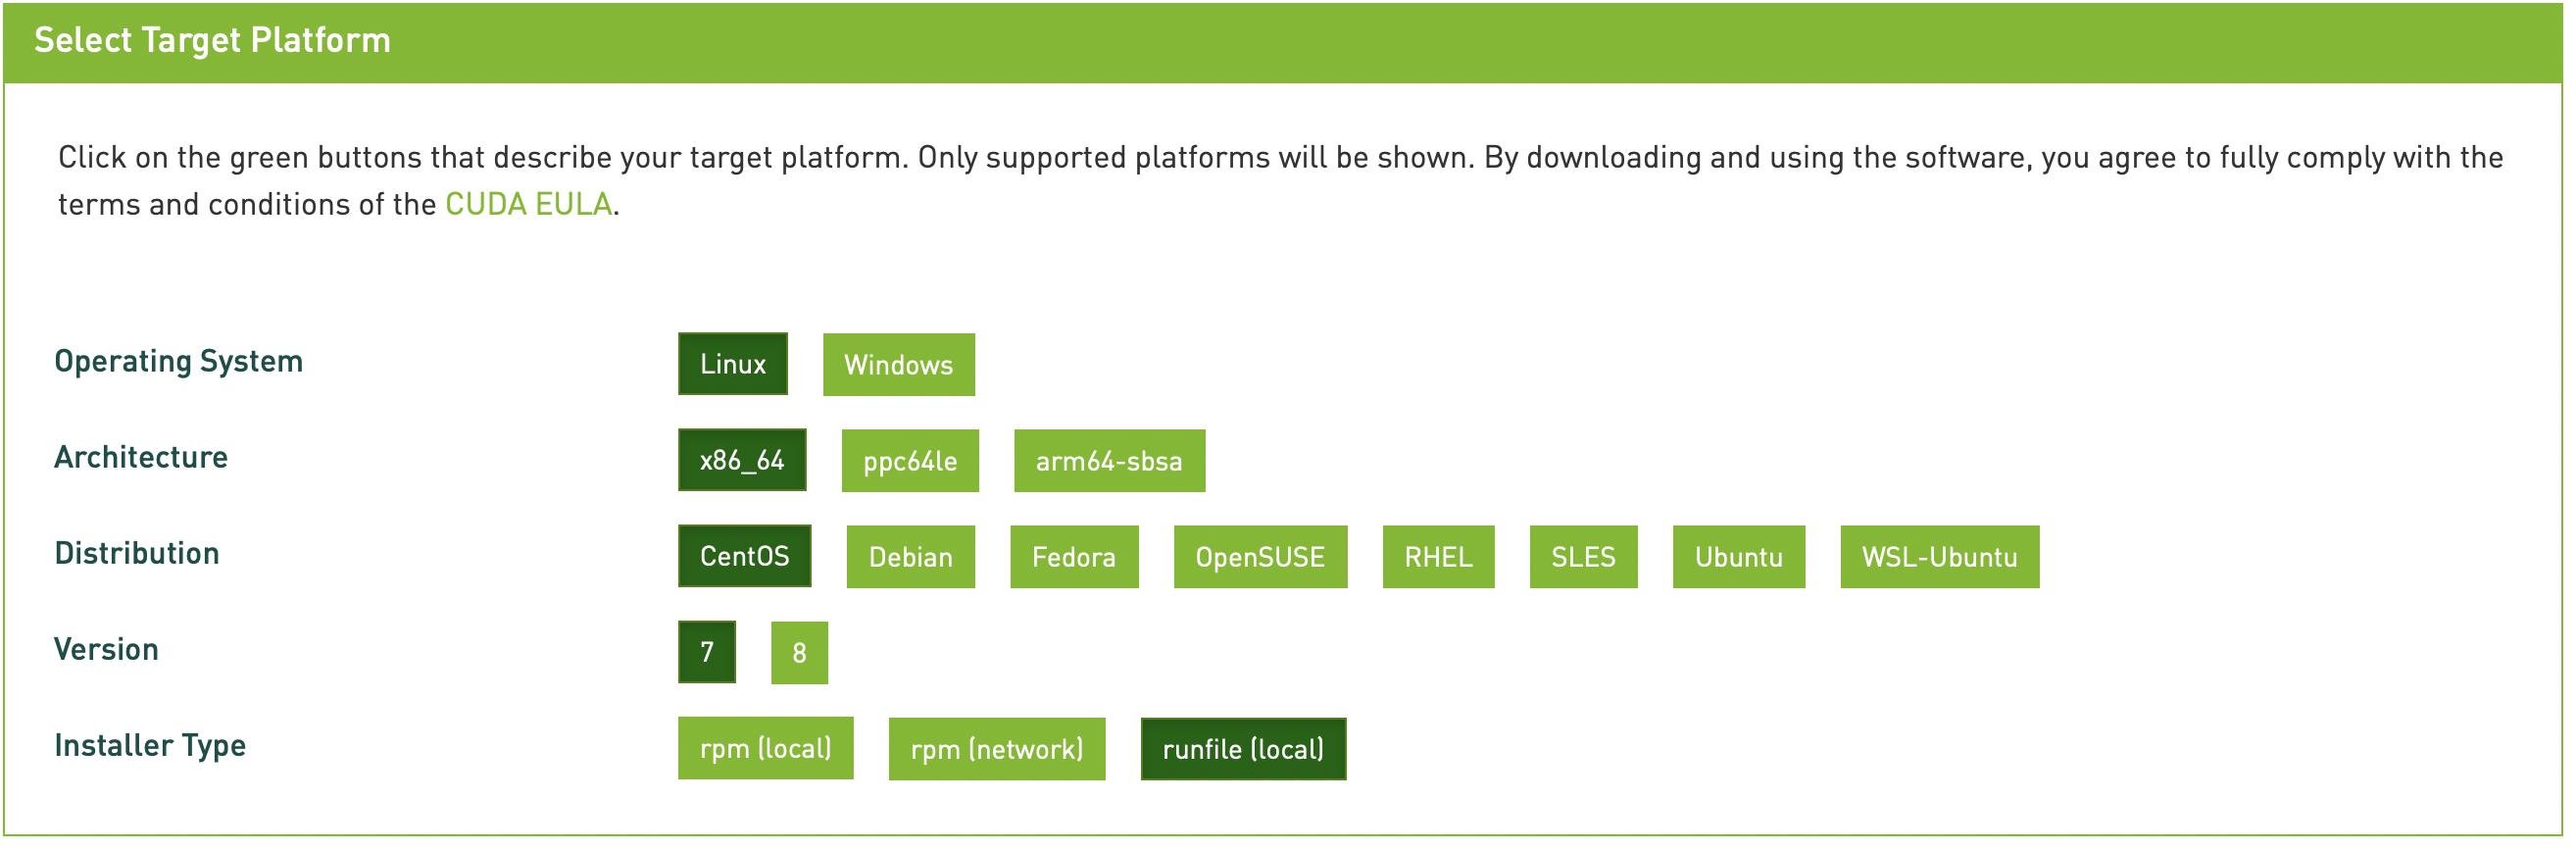
选择对应的版本号(Linux -> x86_64 -> CentOS -> 7 -> runfile[local])
>>> wget https://developer.download.nvidia.com/compute/cuda/11.3.1/local_installers/cuda_11.3.1_465.19.01_linux.run
>>> sudo sh cuda_11.3.1_465.19.01_linux.run
如果遇到如下问题(没有关掉图形界面)
ERROR: You appear to be running an X server; please exit X before
         installing.  For further details, please see the section INSTALLING
         THE NVIDIA DRIVER in the README available on the Linux driver
         download page at www.nvidia.com.
解决方案:
>>> init 3
如果遇到错误(kernel不匹配)
Installing the NVIDIA display driver…
The driver installation is unable to locate the kernel source. Please make sure that the kernel source packages are installed and set up correctly.
If you know that the kernel source packages are installed and set up correctly, you may pass the location of the kernel source with the ‘–kernel-source-path’ flag.
解决方案:
>>> sudo sh cuda_11.3.1_465.19.01_linux.run --kernel-source-path=/usr/src/kernels/3.10.0-514.2.2.el7.x86_64 (这边手动指定上述查看到的内核版本)
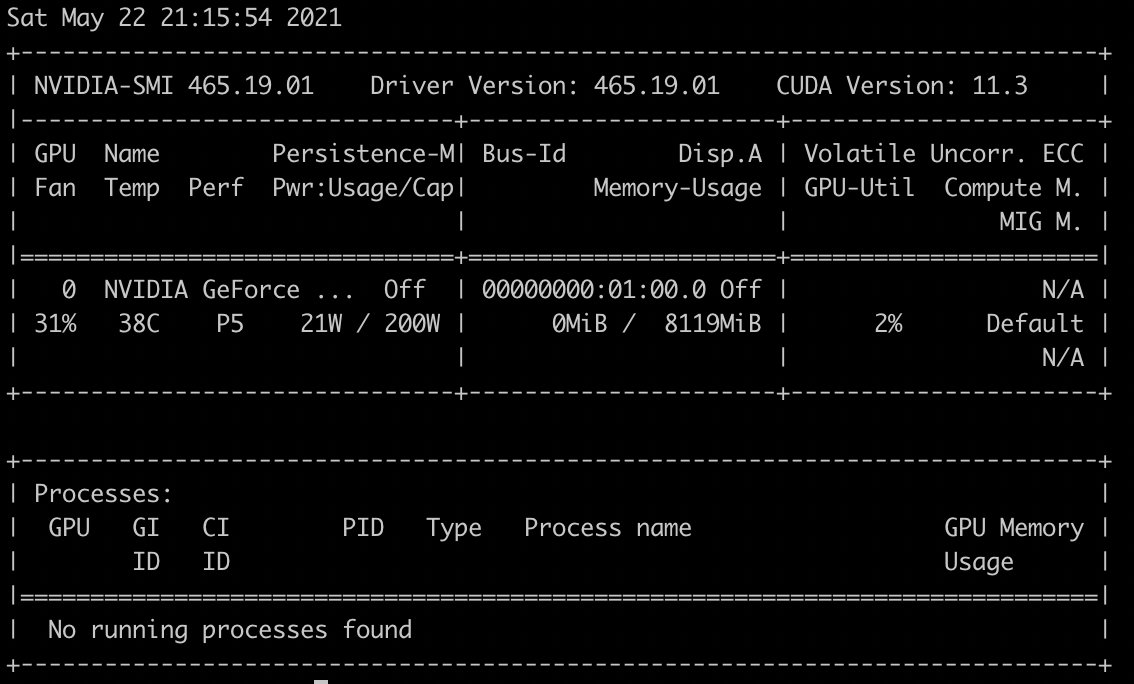
如果安装成功了输入nvidia-smi会显示如下界面
- GCC更新
# 先查看当前的gcc版本:(我当前gcc的版本是4.8.5,我在下面将gcc更新到了7.3,不然后续的安装amber20会报错)
>>> gcc --version
[output]:
gcc (GCC) 4.8.5 20150623 (Red Hat 4.8.5-44)
Copyright (C) 2015 Free Software Foundation, Inc.
This is free software; see the source for copying conditions.  There is NO
warranty; not even for MERCHANTABILITY or FITNESS FOR A PARTICULAR PURPOSE.
有两种方案进行gcc更新:
- 下载gcc源码,自行进行编译
- 参考这篇blog亲测可行
>>> sudo yum install centos-release-scl
>>> sudo yum install devtoolset-7
>>> scl enable devtoolset-7 bash
>>> gcc --version
[output]:
gcc (GCC) 7.3.1 20180303 (Red Hat 7.3.1-5)
Copyright (C) 2017 Free Software Foundation, Inc.
This is free software; see the source for copying conditions.  There is NO
warranty; not even for MERCHANTABILITY or FITNESS FOR A PARTICULAR PURPOSE.
- cmake的安装
# 首先是移除现有的cmake
>>> yum remove cmake -y
# 下载3.20版本的源码
>>> wget https://github.com/Kitware/CMake/releases/download/v3.20.2/cmake-3.20.2.tar.gz
>>> tar -xvf cmake-3.20.2.tar.gz
>>> cd cmake-3.20.2
>>> ./bootstrap --prefix=/usr/local
>>> make -j 4
# -j cpunum 只是为了加快速度
>>> make -j 4 install
# 将可执行程序写入环境变量
export PATH=/usr/local/bin:$PATH
AMBER20和AmberTools21的下载和版权的购买!
- 解压安装包
>>> tar xvfj AmberTools21.tar.bz2
>>> tar xvfj Amber20.tar.bz2
- 安装serial版本的
>>> cd amber20_src/build
>>> ./run_cmake
>>> make -j 4 install
>>> source /home/xxxx/amber20/amber.sh
- 安装MPI版本的
>>> cd AmberTools/src
>>> wget http://www.mpich.org/static/downloads/3.3.2/mpich-3.3.2.tar.gz
>>> tar xvzf mpich-3.3.2.tar.gz
>>> ./configure_mpich gnu
>>> cd ../../build
# 修改run_cmake 文件中个选项: 将-DMPI=FALSE改为-DMPI=TRUE
>>> ./run_cmake
>>> make -j 4 install
- 安装GPU版本
>>> export CUDA_HOME=/usr/local/cuda
>>> cd $AMBERHOME/build
# 编辑run_cmake文件中的选项: 将-DCUDA=FALSE 改为-DCUDA=TRUE
>>> ./run_cmake
>>> make -j 4 install